
Note:
I apologize for the blurry pictures; please see disclaimer in righthand sidebar.
To see clear photos of this party, please check them out on my Shutterfly share site here.
In my last post, I recapped all the fun we had at Ellie's Alice-in-Wonderland-themed first birthday party. Now, let's talk about the party details!
My vision was Alice in Wonderland, but not the Disney version - I wanted to do a more vintage, shabby chic sort of style, and I relied a lot on the Tenneil illustrations for inspiration. When I decided on this theme, I spent a ton of time Googling (and Pinterest-ing!) for ideas. So, I thought I would return the favor and share all the details here, in the hopes that someone else Googling for the same purpose might find something they like. If you are such a person, and have any questions about anything, just email me. I love this kind of stuff and I'm happy to help!
The Invitation
First, let's set the scene with the invitation:
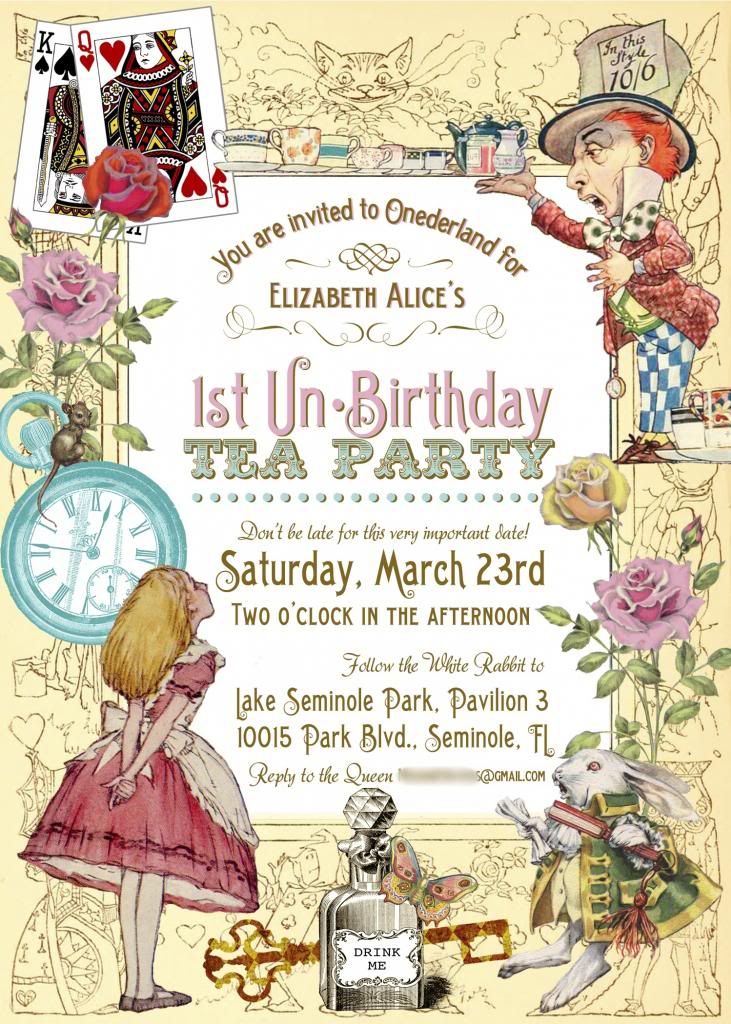
The invitation was created by Jenifer of Hello Love Designs on Etsy. There are tons of great Alice in Wonderland party invitations on Etsy, but I particularly loved this shabby chic version from Hello Love Designs. Jenifer was great to work with and customized the invitation just how I wanted it and got me the file in no time. You can view and purchase the listing in her shop here.
******UPDATE******
As of October 2015, it looks like this Etsy shop has been removed. She still has a Facebook page here but it hasn't been updated in nearly a year.
HOWEVER, a very kind reader (thank you, Amanda!) shared a link to a similar design she found on Etsy by seller Embossed Heart. The similar invitations can be found here. Though I can't personally vouch for this seller, my kind reader did order from her and said she was great to work with.
That is the only place I have seen with a similar invitation but will update if anyone else shares any other good finds!
* * * * * *
When I received my invitation PDF, I uploaded the file and ordered it from Vistaprint. I was so pleased with how it turned out! And of course, I had to add a little something fun to seal the envelopes with:
The envelope seals were designed by me but also ordered through Vistaprint, as well as matching Thank You Notes (also from Hello Love Designs on Etsy). So, paper products: check!
Ellie's Attire
Of course, we had to dress our little Elizabeth Alice to look the part of the guest of honor. I didn't want her to be in an Alice costume, but rather, wanted her to be more Alice-inspired. I found a perfect C.I. Castro dress on Totsy a while back, picked up some black shoes and lacy socks and ordered a black bow on Etsy. And, ta-da! Our Ellie-Alice!

Isn't she just the sweetest?
Decor
Let's talk decor next, because that was something I spent a lot of time on - both looking for inspiration and actually crafting/putting it all together.
Tables:
One of the biggest projects was the table decor. My vision was to have mismatched teacups and teapots lining the tables, filled with fresh flowers. Eric and I spent a lot of time collecting teacups to make this happen, and ended up with over 30 different pieces. Some were gifts from friends, some from garage sales, but most were thanks to the Salvation Army. We picked up some bouquets of fresh flowers from Publix and WalMart the night before, and I arranged the flowers myself. I put one teapot and six teacups on each long (8-foot) table. As for the rest of the table, I put down an Alice-blue tablecloth (The Dollar Store's finest), and topped with with a runner made of paper doilies (taped down to the tablecloth the morning of the party). It was the perfect pretty, vintage look I was going for.

Teacups on the tables!


Left: My favorite teacup, a gift from my Aunt Debbie!
Right: A look at a couple of the tables
I actually intended to also scatter some skeleton keys (found cheap at Michael's) and vintage playing cards between the teacups, but in the mad rush to set everything up I just forgot. I don't think we needed them, though - I loved the look as it was!
Banners:
Another big part of the decor that I spent a lot of time on was banners. I am a girl who loves a good banner. First, the banner that greeted guests as they entered the pavilion, and my personal favorite:

Elizabeth Alice in Onederland!
I also made a long heart/doily penant banner to hang inside the pavilion, from one end to the other. For this one, I used this tutorial and it ended up looking perfect, except for one thing: I used a glue stick. Apparently glue sticks do not hold up well in humid weather, so by the end of the party the doilies (and anything else I glue-sticked) were curling up. But, now I know to adjust my adhesive preferences in the future and I'm an all Glue Dot girl from here on out. And even with the curling edges, I loved this banner.

Heart banner hanging from the ceiling beams
I also planned to have paper chains and streamers hung all over the ceiling, in the hopes that it would feel very whimsical and pretty. But, it was just so windy the morning of the party that I scrapped those ideas. In the end, I think the one simple banner on the inside of the pavilion was perfect.
Of course, there was also a banner of Ellie's monthly pictures strung up at one end of the pavilion, near the food table. I printed each of her monthly pictures in 5x7, mounted them on cardstock (again, glue sticks are my nemesis) and then used pretty clothespins to clip them to a long length of twine. To go with the Alice in Wonderland theme, I also printed out some Alice-themed playing cards (purchased from Etsy seller Vectoria Designs) and pinned each corresponding card next to each month. Perfect!

Ellie's monthly pictures banner
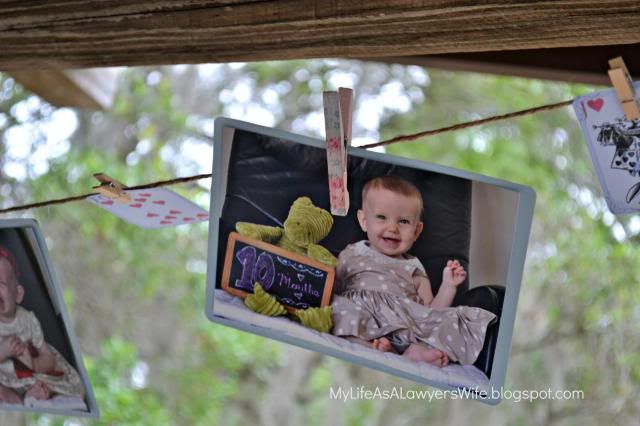
Month 10 was my favorite!
Other Signage:
I also created a couple of signs to direct our guests to the proper place upon arrival. First, there was a "Turn Here" sign at the entrance for the pavilion parking lot:

Turn Here for Ellie's Un-Birthday Party!

The sign in action
As you can see, that sign was accompanied by the White Rabbit himself - or rather, a stuffed rabbit my mom found at a garage sale that I dressed in Wonderland finest.
Then, when you approached the pavilion, there was a sign directing you to Onederland:
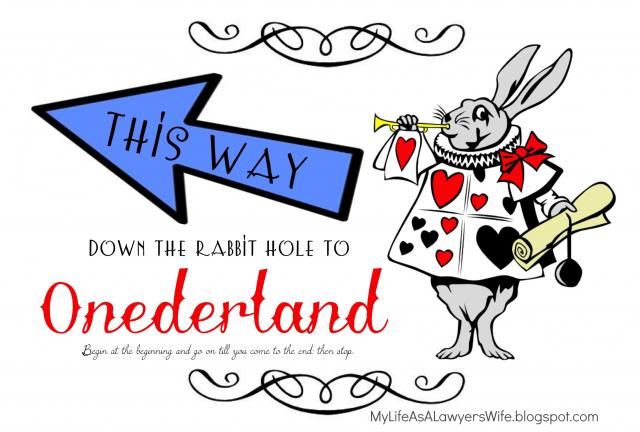
This way down the rabbit hole to Onederland! Begin at the beginning and go on till you come to the end: then stop.
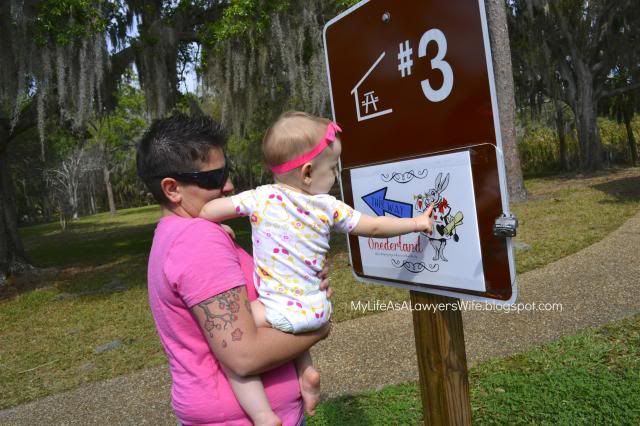
Ellie and her Aunt Kelley checking out the sign
Both signs were designed by me in PowerPoint and printed through Vistaprint.
The Food
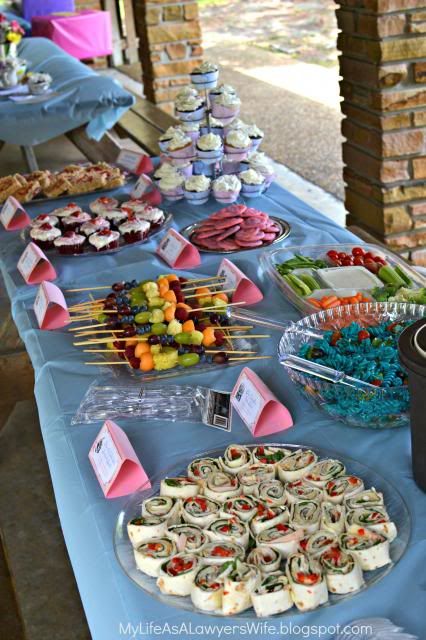
Yum!
Each food was accompanied by a little tent label indicating what it was or what was in it, and included the Tenniel illustration of who/whatever it was named after.
I also cut out pink letters to spell out "EAT ME" on the food table, but those got lost in the shuffle and never made it out. Ah well.
The menu was as follows...
"Down the Rabbit Hole Sandwich Spirals" made by my mom:
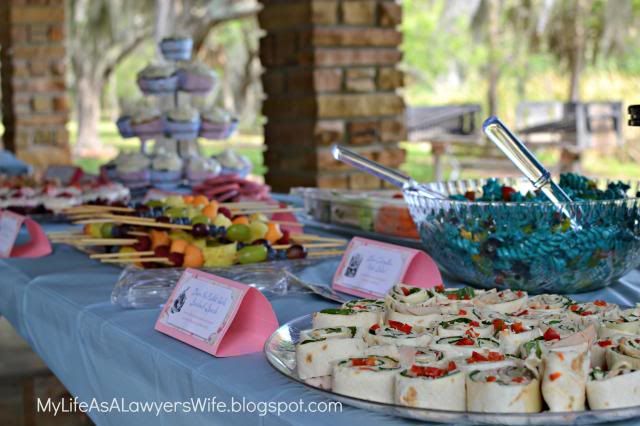
Turkey, white cheese, spinach, red pepper and cream cheese on a flour tortilla
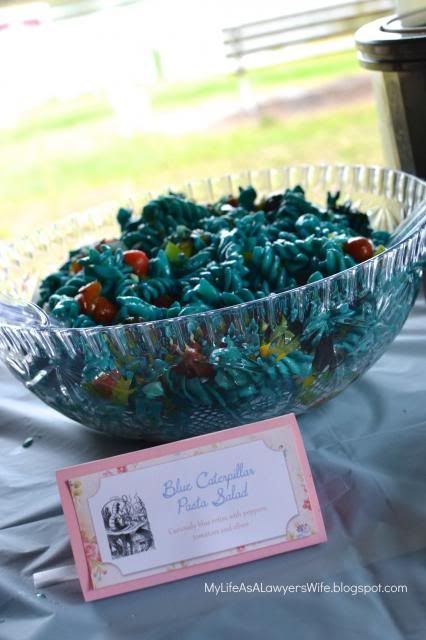
Curiously blue rotini with peppers, tomatoes and olives
"Off With Their Heads Fruit Skewers:"

Assorted beheaded fruit
"March Hare Fare" (aka veggies!);

Assorted vegetables with Ranch dip
And for dessert, we had some tragically melted "Queen of Hearts Red Velvet Cupcakes" that, in their prime, were prettily topped with heart-shaped strawberries:
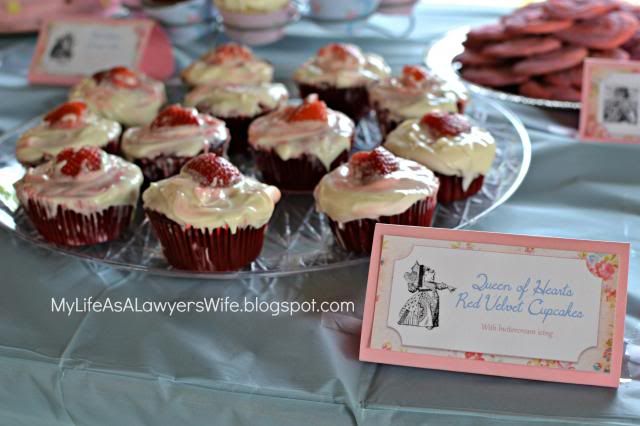
Red velvet cupcakes with buttercream icing and strawberries - oh, how I wish I had taken a picture of them before they left the house! Trust me, they were once quite lovely.
"Royal Guardsman Treats" (Rice Krispie treats decorated with hearts and little guardsmen heads on toothpicks, inspired by the ones seen here):
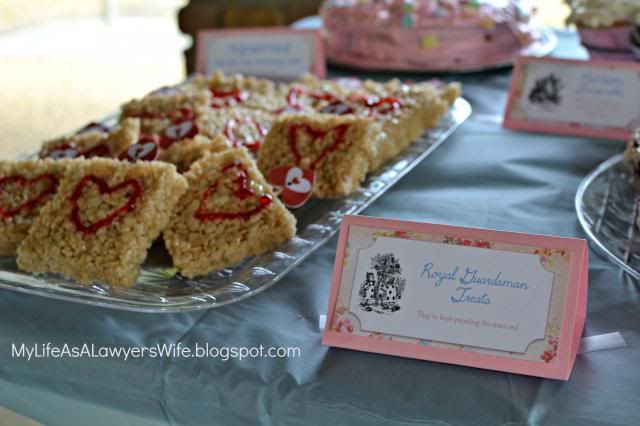
They've been painting the roses red!
"Cheshire Cat Cookies" (sugar cookies made using pink and purple food coloring and this Pinterest method):

Perfectly mad sugar cookies
and of course, "Mad Hatter Teacup-cakes" in two flavors (chocolate and Funfetti), each sitting in its own teacup paper wrapper, purchased from Etsy seller EdesignGraphics and perfectly cut out and assembled by Eric (aka, the Husband of the Year):
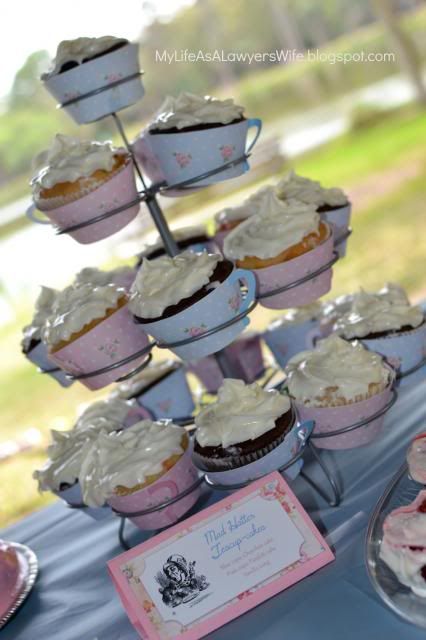
Cupcakes in teacup wrappers
Oh, and I mustn't forget the cake reserved for the Un-Birthday Girl!

Do NOT Eat Me!
The Tea
What would a tea party be with out tea?! A fraud, that's what. So naturally, we had to have tea. In fact, we had a hot tea buffet!
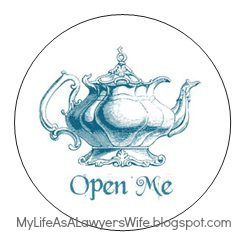
I got one of those little tea assortment packs that comes with 12 or so different types of tea and put that to good use. I purchased Alice in Wonderland tea packets from Etsy seller Vectoria Designs and placed all my tea bags in those. I created little round labels to seal the packets and indicate what flavor of tea was in the packet.

"Drink Me" tea packets
Then, we laid out the buffet, including 10 different types of tea, hot water (obviously), and all the fixin's: lemon slices, cream, honey and sugar cubes. Sure, it was 80 degrees out, but I loved this detail of the party!
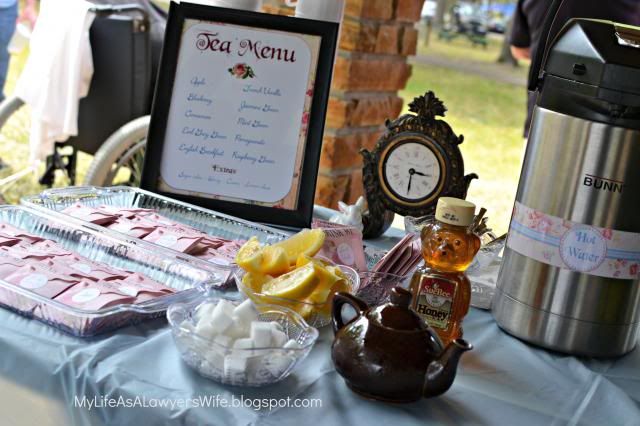
The tea buffet!

The tea menu
And, for our non-hot-tea-drinking guests, we also had iced tea, lemonade and water bottles.
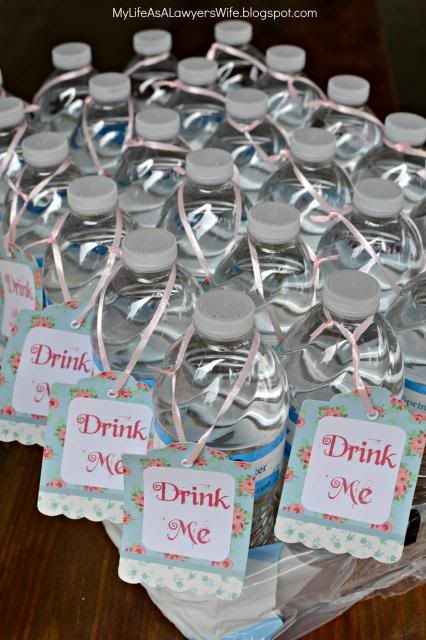
"Drink Me" tags on the water bottles
Activities
This was another big one. I decided that an Alice in Wonderland party simply had to have croquet, which seemed like a fun activity to have around for people to play or not play, as they wish (I'm generally not one for organized games at parties). First, I wanted to make a grand entrance to the Queen's Croquet-Ground, so I designed this banner in PowerPoint and again, had it printed through Vistaprint:

The Queen's Croquet-Ground
To accent that, I strung up a bunch of playing cards and paper hearts which Husband of the Year artfully hung around the banner.

The finished look - didn't Eric do a great job?
For the Croquet Ground itself, we picked up a basic croquet set at Toys 'R Us and altered the wickets to look like playing cards using some foam board and a red sharpie. We set those up and accented them with a couple of lawn flamingos and some stuffed hedgehogs (actually, they're dog toys! Found on Amazon).

Playing card wickets, with hedgehogs and flamingos running amok
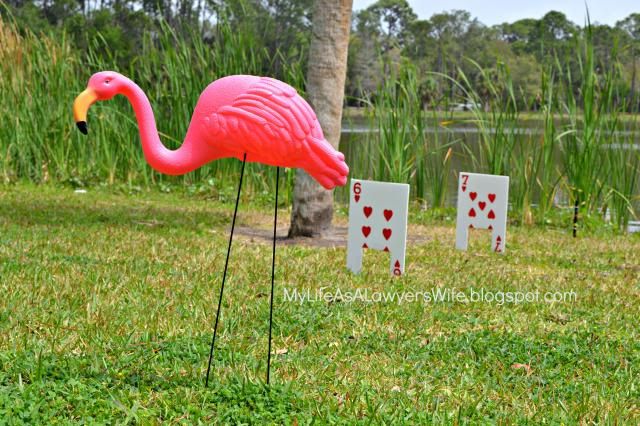
Flamingo on the croquet ground
In case our guests were not familiar with the rules of croquet (let's be honest, who is?), I typed up some instructions which we posted near the mallets.

Croquet Rules
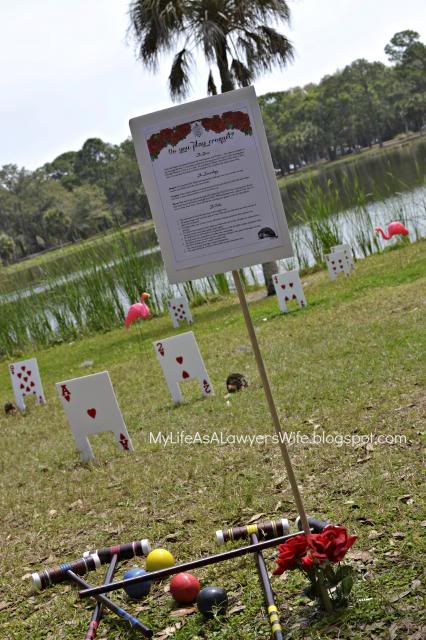
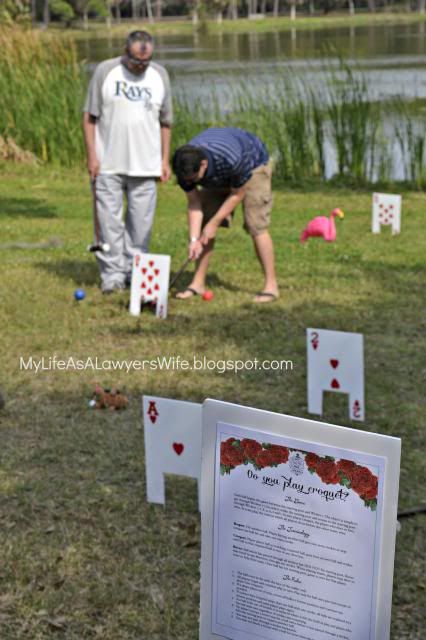
A look at the croquet grounds, including a game actually being played!
Photo Props:
We are people who love photos, so we decided it would be fun to give our guests the opportunity to get into the spirit and play the Alice In Wonderland part. We tracked down some props for people to use to dress up as either the Mad Hatter (a costume hat found on Amazon), Queen of Hearts (heart crown and scepter found at Michael's around Valentine's Day), White Rabbit (rabbit ears found everywhere because it was Easter time, and a toy pocket watch found at Michael's) or Cheshire Cat (giant grin drawn by yours truly onto foam board, cut out by Husband of the Year, pipe cleaner whiskers added, and stuck on a skewer stick). The props were laid out on a table with the following poem to give instruction:

Photograph Me!
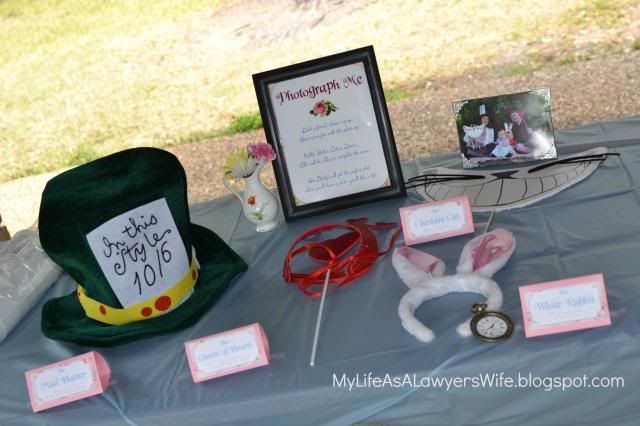
The photo props on display and ready for use
Each prop was labeled, including a quote by the character. There was also a photo of us demonstrating how it's done!

The Mad Hatter, White Rabbit, Cheshire Cat and Queen of Hearts props

Demonstrating proper prop use!
I loved this part of the party, and the fact that everyone participated. The pictures came out great!

One of my most favorite of the prop pictures!
(Also, the only picture we have of me, Eric and Ellie together at the party. I so wish we had remembered to take a picture of the three of us at some point!)
Guestbook:
We wanted to have a way to remember all of Ellie's guests at her first birthday party. I first planned to try to do something artsy with the photo prop pictures, but then we had the idea to pick up an old edition of Alice in Wonderland and have our guests sign the inside cover. Eric took charge of this project and found a lovely copy of the book on Amazon, and our guests signed away. I think this will be a great keepsake for Ellie!


The guestbook

Sign Me!
And I think that's it! I was so pleased with how the party turned out, although I must confess to swearing on several occasions that from here on out, we're picking up a supermarket cake and maybe taping up a balloon and calling it a day. Planning this party almost felt like planning my wedding all over again, but honestly, no matter what I may have said in the heat of stress I love this kind of thing. I had a blast planning, creating and executing this shindig, and trying my best to make an unforgettable party in honor of my baby girl.
Thanks again to everyone who came and helped make the day so special for us. We are so happy to have such great memories of our daughter's first birthday, thanks to you!
24 comments:
Happy birthday No. One to Ellie! Her party looked so fun and creative.
The details were all so amazing, I especially loved the flowers in tea cups and the banners you made! :-)
Great job!!!!!!
You have some really great ideas! Beautiful!
I am one of the ones spending lots of time pinning and planning just as you did! Thanks so much for sharing - I especially love the cards and hearts garlands!
I came for the invitation, because jealous because a) the designer is on hiatus from etsy now and b) I probably couldn't afford them anyway and stayed for the rest of the post!
Hi there - I absolutely LOVE the theme and you pulled it off so well. All the little details are great. I'm currently planning my daughter's themed birthday. Do you know the name of the font you used for the "Open Me" text? Thanks!
Hello, Anonymous! I hope you'll check back here! Thanks so much for your nice comments. The font is "Beyond Wonderland" and it's free on dafont.com. Please let me know if there's anything else I can help with, and happy birthday to your daughter!
I am sooo glad I came across this on Pinterest! I'm planning a Quarter Century Celebration Tea Party in Wonderland for my big 2-5 this year. I'm starting early so I can make sure I have time to acquire all the things and ideas I want to make it perfect. [Super early, my birthday isn't until December!]Thanks so much for this post!
I loved the lost list ideas about themed kids birthday parties. There are not many innovative kids party places in Staten Island, fortunately I found one of the party halls in Staten Island which was not only affordable but were a very good host.
I was looking for other options other than this, so please help me out.
The pictures and ideas are very creative i like it kids party places in staten island
I love all of your creative idea's. I'm doing something very similar for my daughter's first birthday. If you don't mind me asking, how did you make the first banner? I LOVE it.
Hi, LaTorra! I hope you check back here and find this!
If you are talking about the "Elizabeth Alice in Onederland" banner, I cut the letters out of cardstock (the font I used is Daisy Regular, available on dafont dot com for free, in size 550), then strung them together with a thin ribbon. Easy peasy!
Good luck!
Your party is so beautifully detail-oriented! I am planning an Alice in Wonderland first birthday for my daughter. May I ask how you made all of the signs/menu cards?? The floral theme to them is wonderful!
The party looks so amazing! I love every detail, down to me planning a 1st birthday for my daughter Ellie!
Where did you have your tags made for the food items?
Michelle and Jessica - Thank you! I'm glad you liked everything! Happy birthday to your daughters!
Michelle and Rachel - I made all the signage myself. I Googled for free vintage floral digital paper for the background (and ultimately used these: http://www.freeprettythingsforyou.com/2012/09/free-vintage-shabby-digital-papers/). I also googled for the Tenneil illustrations for each character. Then I put everything together in PowerPoint, printed them and mounted them on solid colored cardstock. Hope that helps! If you have any other questions, feel free to email!
Love the name banner! Did you punch holes in the letters to string them up, or tape/glue them to the ribbon?
Very impressed!!! you are very creative!!
It is so so gorgeous, creative & inspirational! Great ideas!
Love the blue caterpillar pasta salad! When/how did you add the blue food dye while making it? Also, did you put dressing or anything on it? I usually add vinegar & oil to my pasta salad and did t know how that would work with the blue dye?
stocking{UP} - If memory serves, I cooked the pasta completely, drained it, then put it in a ziplock bag with blue food coloring. I shook it up to cover all the pasta then let it soak for a while. I don't remember how much I used or how long I let it sit, unfortunately. (If you're on Pinterest, look up how to make rainbow pasta - there might be more explicit instructions there!)
I also don't recall the recipe for the pasta salad, so I'm not entirely sure what dressing I used but I do feel it was an oil-based dressing and the food coloring stayed just fine.
Sorry I can't be more specific, but I hope this helps!
love your ideas some of which I plan on using for a 8th grade graduation
love your ideas some of which I plan on using for a 8th grade graduation
I just want to know what's in the spiral sandwiches lol
Post a Comment