
I'm not going to do any full tutorials this year, largely because, well, I don't feel like it. Ha! But also, most costumes were just embellished by me, and not made entirely from scratch. There are a couple of exceptions to that statement (most notably, Eric's Flynn Rider vest, which was my largest sewing project to date), but for most of those things, excellent tutorials are already floating around out there on the Internet so I see no reason to reinvent the wheel. I will, however, direct you to my inspiration and any tutorials I followed!
So, let's put together a Tangled family Halloween costume!
* * * * *
Rapunzel

Ellie (3.5 years old) as Rapunzel!
Ellie was so excited to play the lead role in this year's tale, and she did so beautifully in a store-bought Rapunzel dress. It was a special dress, brought from Tokyo Disney just for the occasion (thanks to her aunt who returned from Japan with dress in tow just in time for Halloween)! Ellie loved it.

Lovely!
Of course, the coolest part of this dress was that it had a little battery pack in it that made the skirt light up—a big hit with Ellie, and perfect for trick-or-treating in the dark!

Ellie's light-up dress!
No Rapunzel costume would be complete without "long, long hair," so I made Ellie a long braid out of yellow yarn using this tutorial. After making the braid I glued a ton of pink and purple flowers all over it to mimic Rapunzel's braid in the movie.

Rapunzel's braid, heavily adorned with flowers

My interpretation
As for shoes, as Ellie will tell you, Rapunzel "wears barefoot" but obviously that's not an option for trick-or-treating. So, I picked up some plain white shoes at a consignment store and covered them in purple glitter (using this tutorial, which I also used to make Ellie's Tinkerbell shoes last year) and glued some gemstones on the toes. Because, you know, if there's anything to get Ellie to slightly break character, it's glitter and jewels. As expected, Ellie loved them.

Shoes fit for a long-haired princess!
And so our Rapunzel was Halloween-ready!
Pascal
Of course, Rapunzel needs her trusty chameleon friend Pascal by her side.

E.J. (15 months) as Pascal!
I got really lucky with E.J.'s Pascal costume: I found a frog costume in his size for cheap at a consignment sale, and I was able to use that as the base. It was the full suit with hood and mittens, which was all the hard stuff! With a few modifications, that frog became Pascal.
One big change was the eyes. The frog eyes were narrow and squinty and I wanted them big and round and expressive like Pascal's eyes are. So, relying heavily on this full Pascal costume tutorial, I added some stuffing and felt to the eyes to fill them out a bit.

The eye on the right is the original frog eye, and the one on the left is my modified version. I rounded them out, added "eyebrows," and gave the eye itself more dimension. (He still got called a frog, but hey, let's just say he made a darn cute amphibian and not get ourselves worked up over it.)
Naturally, Pascal also needs that curly chameleon tail. I once again used the tutorial linked above to make a tail, and then I sewed snaps to the tail and the suit so the tail was removable. It didn't look quite as nice as it would have if I just sewed the tail directly onto the suit, but my purpose was twofold: 1) I wanted to be able to remove the tail so E.J. could sit comfortably in the stroller or car seat in his costume; and 2) I wanted to make a babywearing version of his costume (more about that momentarily), and by using snaps on the tail I was able to remove it and snap it onto the carrier cover I made for an easy transition from toddling to wearing.

Pascal's curly tail
I also wanted to make some little feet to go over E.J.'s shoes. I used the same tutorial linked above to create little feet, which I sewed to the bottom of the suit legs. I attached elastic to the bottom of the feet so they would stay on top of his shoes, and voila: chameleon feet!

Look at those little chameleon toes!
Now, I also wanted to have the option to wear E.J. in a baby carrier for all of our various Halloween outings. But, I didn't want the carrier to cover his adorable chameleon-ness. So I had to make a cover for my carrier. I once again lucked out and found a dinosaur costume for a dog in the Dollar Spot at Target for only $3. It fit perfectly over my carrier! The straps of the costume that go around the dog's neck fit nicely over the shoulder straps of my mei tai (I added Velcro at the sides of the carrier to hook them on better), and the waist strap of the costume hooked right around the front panel of the carrier. Perfect! All I needed to do was chop off the dinosaur tail, trim down the spikes and add some snaps so I could snap on the tail I made. Voila!

Chameleon-wearing! (My cape had arm holes which were perfect for threading my mei tai straps through for back-wearing!)

Our whole family: the babywearing version
And that's how we created our happy little chameleon!

The sweetest Pascal!
Flynn Rider
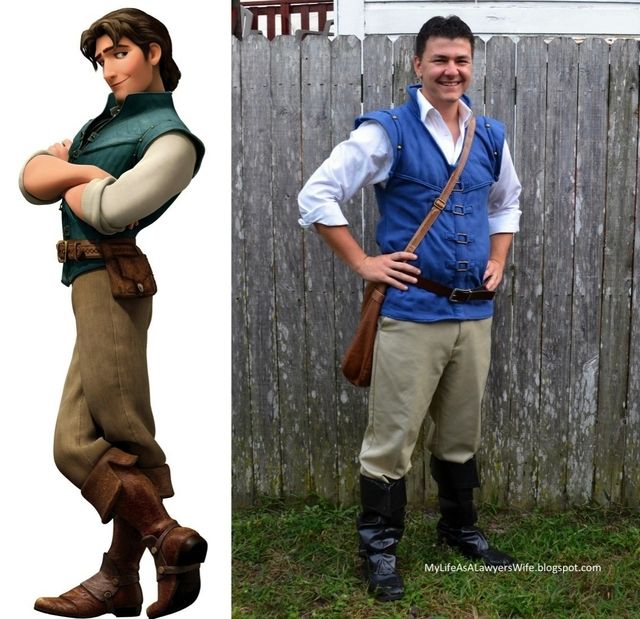
Eric as Flynn Rider
Ah, Flynn Rider! My biggest labor of love this year. Most of the costume was easy: Eric already had the white shirt and khaki pants, and we ordered some cheap boot tops on Amazon. His "satchel" was a brown purse of mine. He wore a belt he already had.
The vest, though, was a project. Pinterest served me well with vest tutorials and I referenced both this one and this one pretty extensively. The vest isn't actually a vest in that it doesn't open and close; it goes over his head like a shirt. I used blue fleece and traced one of Eric's shirts for the "pattern," leaving a little extra length at the shoulders to make faux "sleeves." I sewed lines on the front panel of the vest to give it a little texture (as described in this tutorial), made a collar (using this tutorial) then sewed on the buckles and other details. I was so pleased with the end result!
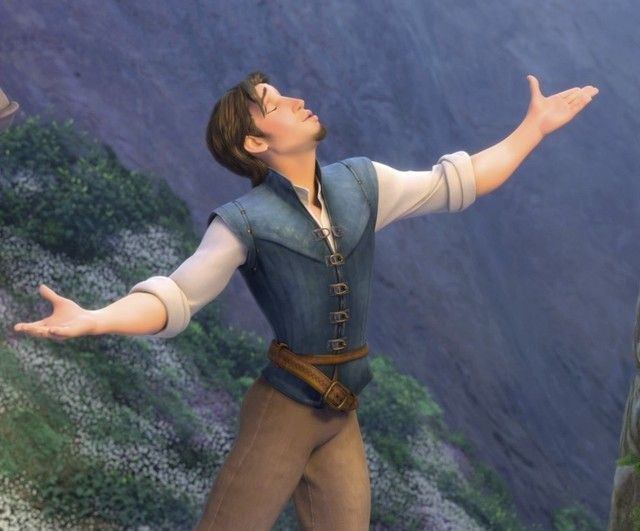
A closer look at Flynn's vest from the movie

My interpretation!

A better look at some of the details
Mother Gothel
Last year was a nice break from being the villain for me, but I was back at it this year!

Mother Gothel!
My costume required the least work of all of them. I found this Renaissance dress on Amazon and thought it was a near-perfect match. I paired it with a black cape I already had, as Mother Gothel often sports a black cape while she's out and about.

Looking rather wicked
The rest was just makeup. I used spray hair color to color my hair black, and did my best to do some gold/bronze eye makeup using this picture as a guide:

Mother Gothel's makeup
I'm far from a makeup guru, but at least I felt I looked the part!

Mother knows best!
Maximus
Last but not least, we have crime-fighting palace horse Maximus, played by our dog, Achilles!

Achilles as Maximus
Achilles' costume was the only one I made completely off the cuff. For his mane, I cut a piece of felt to go across the top of his head like a hat, and cut two ear holes in it. I sewed an elastic strap to the bottom to hold it on his head, and I attached a long, loose strip of faux leather to the top of the elastic pieces to serve as the reins. Then, I wrapped a pipe cleaner around the hat piece and let it extend down the back of his neck. I tied pieces of white yarn to the pipecleaner to create the mane.
For his saddle/harness, I sewed a piece of black felt onto red felt to look like the saddle on top of a blanket. I sewed straps to the bottom of the red blanket piece to hold it to him, and secured them with Velcro. I also sewed a little ribbon loop at the top of the vest where the pipe cleaner from the mane met the saddle, so I could hook the pipe cleaner to the saddle and hold it all together.
I also sewed two strips of brown felt to the front of the saddle piece in a V-shape to make the harness, and attached one strip of faux leather from the point of the V back to the Velcro straps on the saddle blanket so it all went on just like a regular dog hardness would. I decorated the brown V-straps with yellow puffy paint, adding the gold dot detail and sun emblem to the center.
I must say, Achilles is getting better and better at posing for pictures. He was on his best photogenic behavior this year!

Look at that poise!
What a noble steed!
* * * * *
And there you have it! This marks four years now of family costumes for us, and I've had such a blast with each one, it's hard to pick a favorite:

This was definitely a fun one!
1 comment:
Great ppost thankyou
Post a Comment